Clopay Insulated Steel Sectional Garage Door Installation

*Insulated Steel Residential Garage Door Installation Instructions and Maintenance – 3, 4, and 5 Layer Construction
1. Safety and Preparations:
- Read and understand all safety information and warnings in the instructions.
- Use proper protective gear like gloves, goggles, hard hats.
- Get assistants for heavy lifting.
- Check that you have the minimum headroom space, backroom space, and side clearance required for the door opening. Refer to size charts for standard requirements.
- Inspect materials and verify you have all needed door sections, hardware components, and materials per included checklists before beginning.
2. Removing Existing Door:
- For doors with torsion springs, have a professional remove them first before disassembly.
- For doors with extension springs, raise door and clamp tracks on both sides to stabilize sections. Detach springs, cables and hardware with door raised.
- Remove C-clamps keeping door from falling. Carefully close door. Use wood blocks to prevent fingers being trapped.
- Starting with top section, unstack and remove door sections one by one from opening.
- Detach all remaining old track and hardware from jambs, except reusable rear hangers.
3. Preparing the Doorway:
- If old jambs are damaged, replace with new 2×6 lumber. Jambs should be plumb and header level.
- Install stop molding around edges of opening, flush with inside framing.
- Be sure jamb bolts are recessed enough for flush track mounting.
4. Bottom Section Preparation:
- Identify bottom section – will have weather seal retaining flap on bottom edge.
- Place section face down on covered sawhorses.
- Break apart and attach bottom brackets by hand with tabs fully engaged into slots.
- Attach lift cables to bottom bracket buttons (extension spring doors only).
- Attach hinges to prepunched holes along top edge using specified screws. Add struts if needed.
- Install lift handles to bottom and lock sections.
5. Stacking and Securing Sections:
- Stack sections in proper order according to height charts provided.
- Place bottom section in opening centered side to side. Level and secure with nails through section ends.
- Stack remaining sections in order, securing each with nails through section ends as stacked.
- Attach hinges between each section using specified screws.
- Install track rollers into hinges at ends of every section.
6. Reinforcing the Top Section:
- Reinforce top section to provide attachment point for opener per instructions.
7. Setting Up the Tracks:
- Assemble track brackets and flag brackets to vertical tracks loosely.
- Mount vertical tracks over rollers with 1/2″ clearance.
- Mark and drill pilot holes for lag screw track mounting through flag brackets.
- Attach flag brackets to jambs with lag screws. Tighten track hardware.
- Check vertical track alignment and level on both sides of opening.
8. Horizontal Tracks and Rear Hangers:
- Assemble horizontal tracks to vertical tracks and mount rear track hangers to ceiling following specifications.
- Temporarily support rear of tracks until hangers are installed.
- Square and level rear track hangers following measurements precisely. Anchor to ceiling with lag screws.
9. Final Assembly Steps:
- Adjust top section and tighten top roller brackets. Remove any temporary nails.
- Install lock if provided. Install pull rope on manually operated doors.
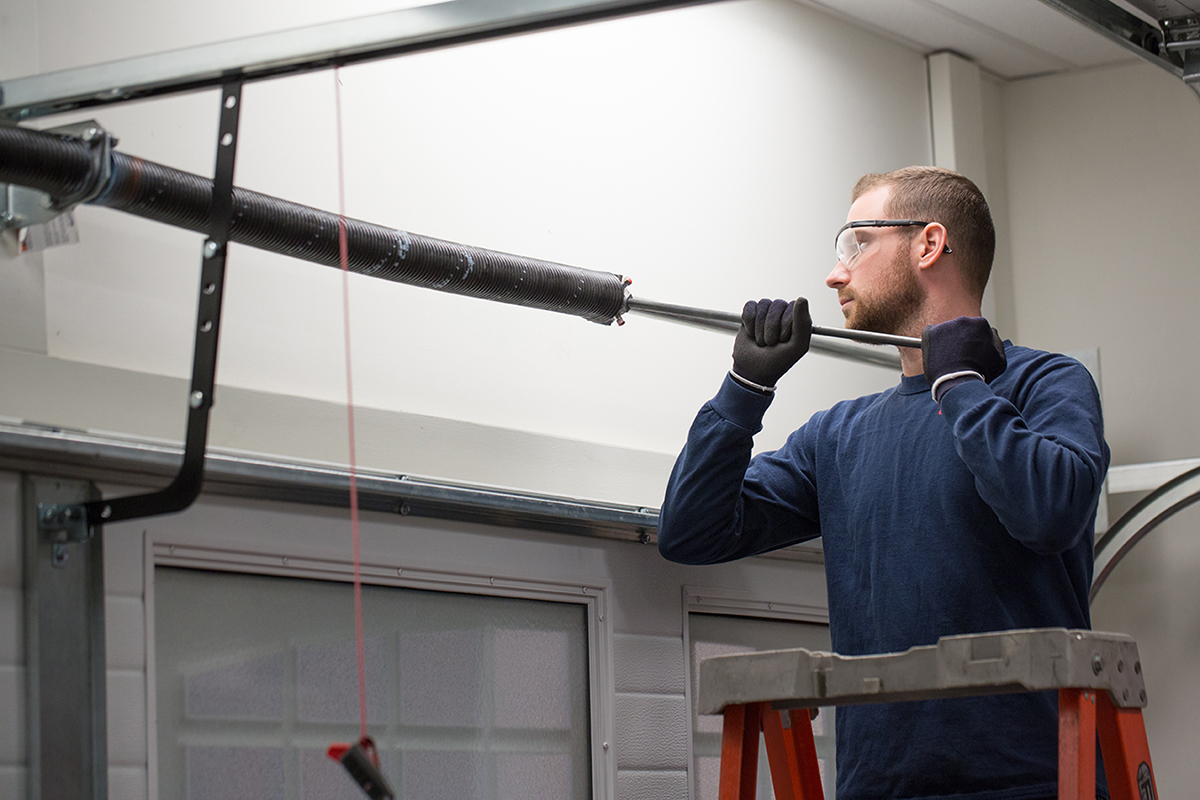
- Install springs and containments per supplemental spring instructions.
- Reinforce top section and attach automatic opener reinforcement bracket if adding opener.
- Mount opener head and rail following opener manufacturer’s instructions precisely.
- Attach opener arm to reinforcement bracket at proper height and angle.
10. Testing and Wrapping Up:
- Test operation thoroughly after installing. Make any adjustments needed.
- Provide homeowner maintenance and operation instructions.
Let me know if you need any clarification or have additional questions on these installation steps! I can add more details to any section.