Clopay Low Headroom Conversion Kit Installation

- Verify the existing horizontal track radius by measuring from the center of the track curve to the bottom of the track (“R” dimension). Kit fits 12″ or 15″ radius tracks.
- Determine the reduced vertical track length needed:
-
- For common door heights, refer to the provided length chart.
- For other heights, take door height in inches and subtract 12″ (12″ radius) or 15-1/2″ (15″ radius).
- Measure and mark the excess vertical track length to be removed above the top roller. Cut track squarely with a hacksaw.
- Drill two new 1/4″ holes near the top of the vertical track for attaching the flag bracket.
- Check flag bracket clearance on the cut vertical track. If needed, cut 3″ off the top of the flag bracket with a hacksaw.
- Reattach flag bracket to vertical track using bottom row of holes and track bolts/nuts.
- Attach the provided low headroom safety bottom brackets to the bottom section’s end stiles, engaging the locking tabs. Secure with screws.
- For extension spring doors, hook the lift cables onto the bottom bracket buttons. (Skip for torsion spring doors.)
- Follow the main installation manual to install the vertical tracks and install the sections, hinges, and rollers.
- Remove the horizontal track mounting bracket. Align and attach the low headroom front upper track to the standard track with track bolts/nuts. Repeat for other side.
- Align the low headroom rear upper track with no more than 1/8″ gap from front upper track. Mark, drill holes as needed, and attach rear track with track bolts/nuts. Repeat for other side.
- Temporarily hang rear of track assembly. Attach the curved end of the lower horizontal track to the flag bracket with track bolts/nuts in the correct holes per door thickness.
- Attach the starter angle to the flag bracket with the provided carriage bolt/nut in the proper hole for door thickness.
- Fasten the rear of the horizontal track assembly to the ceiling with a 3/8″ x 1″ bolt/nut through the tracks and rear track hanger. Repeat for other side.
- Insert roller into low headroom top bracket. Insert roller assembly into horizontal track. Slide bracket against top section end stile.
- Line up top bracket with top section and drill pilot holes. Attach securely with specified fasteners. Repeat for other top bracket leaving loose.
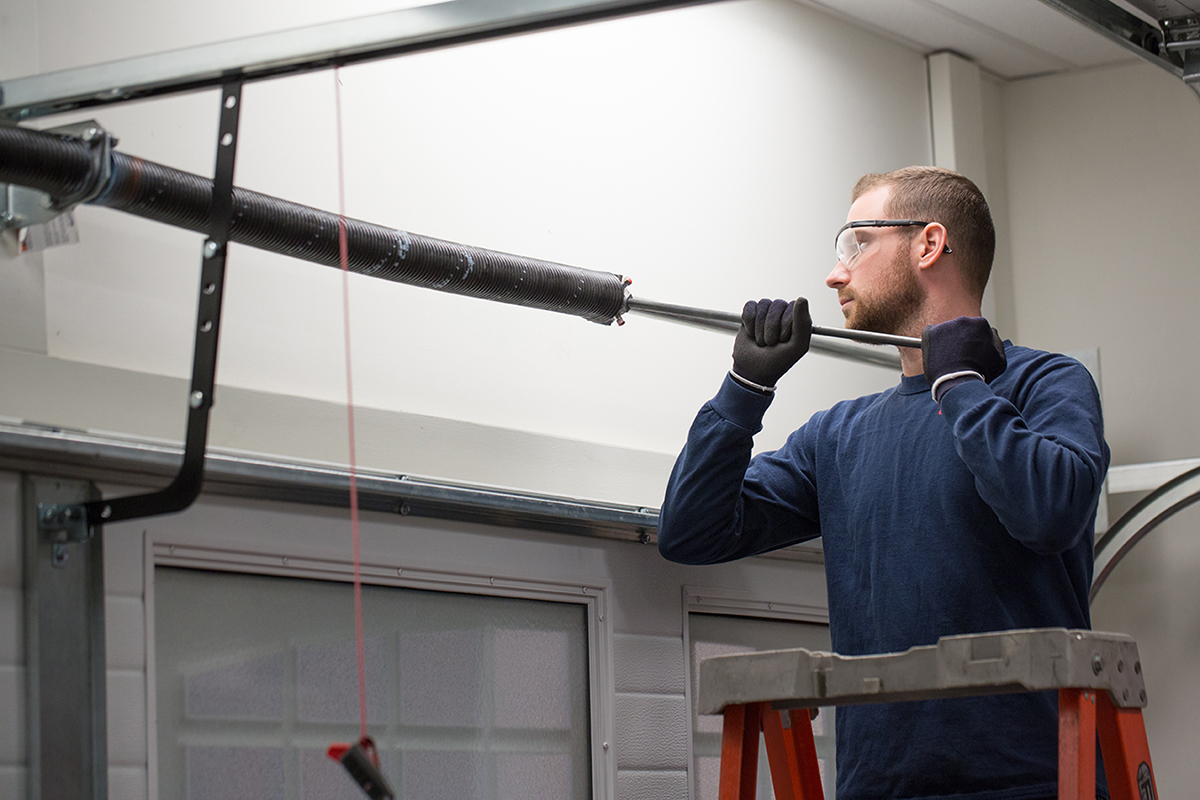
- Install the spring system:
-
- For extension springs, insert sheave bolt through starter angle and attach springs as directed.
- For EZ-Set extension springs, follow the provided supplemental LHR instructions.
- For EZ-Set torsion springs, follow standard instructions except for attaching winding unit bracket to flag bracket.
- Complete spring system installation and safety containment kit installation per the instructions.
- Finally, make any needed adjustments to top section and tighten top roller bracket fasteners.