Clopay EZ-Set Extension Spring System Installation

Preparation:
- Verify minimum 5-1/2″ side clearance on both sides of the door opening to accommodate EZ-Set system.
- Gather all required spring system components using the provided parts list and checklist.
- Have all necessary tools available including drill, hex driver, wrenches, hammer, punch, etc.
- Read all warnings and cautions thoroughly. Use proper protective gear.
- Door should remain closed during spring installation.
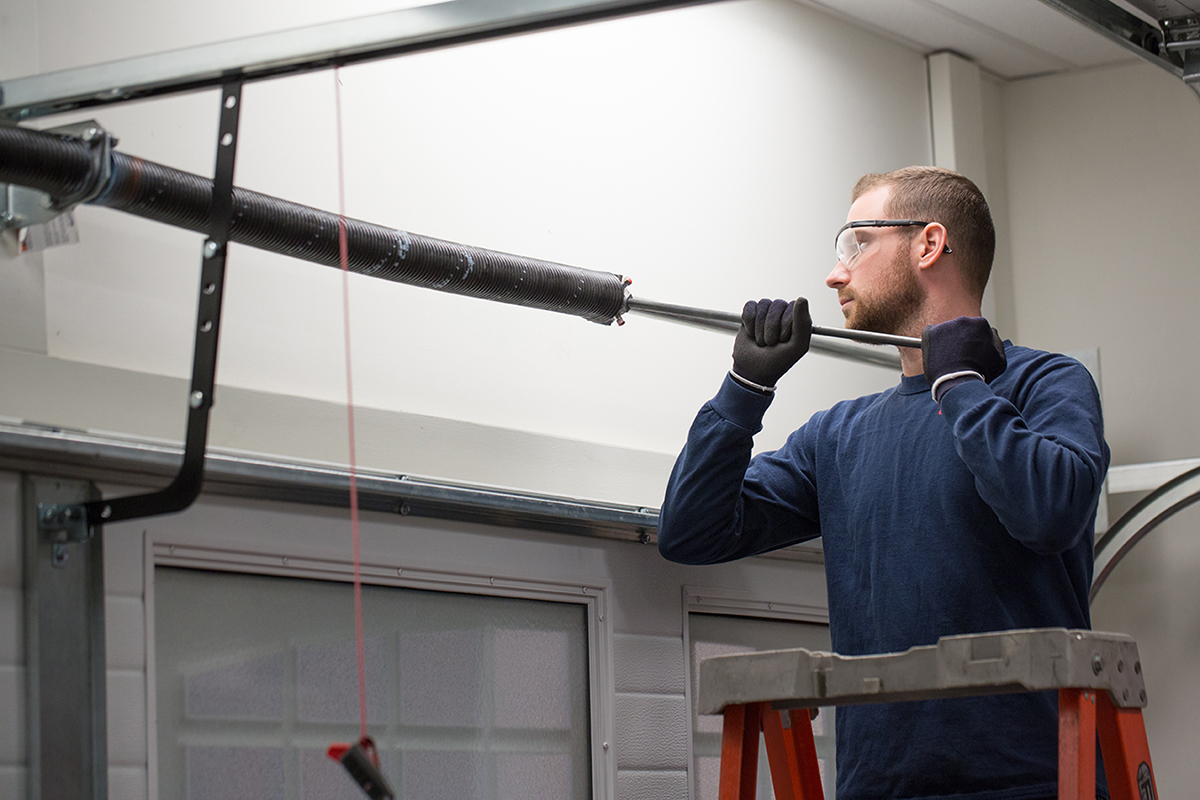
Assemble Spring System:
- On the floor, assemble the springs, forks, sheaves, and bushings using the specified 3/8″ x 1-1/4″ hex bolt and nut. Ensure bushing seats properly in fork.
- Remove the pre-wound spring housing from packaging. Slide housing into the housing bracket marked “L” for left and “R” for right. Note cable will extend through top slot.
Mount Spring System:
- Position left housing bracket against horizontal angle. Align bracket holes and angle slots.
- Attach housing bracket with two 3/8″ x 3/4″ hex bolts and flange nuts. Bolt and nut closest to jamb goes through flag bracket first. Ensure safety tab engages round hole in angle.
- If angle holes don’t align, drill three 3/8″ holes for hardware and tab per diagram.
- On rear track hangers, assemble 5/16″ eye bolts and nuts around 12″ above tracks on both sides. Tighten nuts firmly.
Attach Springs:
- Hang looped end of extension spring on 5/16″ eye bolt. Allow to hang temporarily.
- Attach sheave fork to free end of hanging spring.
- Thread safety cable through spring and eye bolt. Feed end through fork bushing and housing bracket. Pull taut and clamp with sheet metal screw firmly against bracket.
- Thread lift cable from housing under and around spring sheave and over stationary sheave on housing bracket.
- Run lift cable down to door and attach looped end to bottom bracket button securely.
Tension Springs:
- Ensure door is fully closed and locked. Insert 1/4″ hex driver into housing worm drive.
- Using drill, rotate hex drive clockwise to tension springs. Ensure driver is fully inserted.
- Wind springs until red marks on safety cables are covered by fork bushings. Equal tension on both sides.
- Carefully raise door halfway open. Check tracks are parallel with door edges on both sides.
- Re-adjust spring tension if door wants to rise or fall. Wind more for falling, less for rising.
- For low headroom doors, follow supplemental LHR instructions for attaching housing brackets before tensioning.
- When tensioning LHR springs, start with clockwise winds to set initial tension properly.
Finish Installation:
- Raise door fully and re-check track alignment. Confirm smooth operation.
- Install safety containment cables per main instructions.