How to Install a Chamberlain Garage Door Opener – A Comprehensive 20-Step Guide
*Applies to the following Chamberlain models:
Chain Drive – C2102, C2202T, C2212T, C2405T, D2101, D2405T
Belt Drive – B2202T, B2210T, B2211T, B2212T, B2215T, B2401T, B2405T, B4505T

Introduction
This document provides a comprehensive, step-by-step guide for properly installing a garage door opener to ensure safe operation and functionality.
Pre-Installation
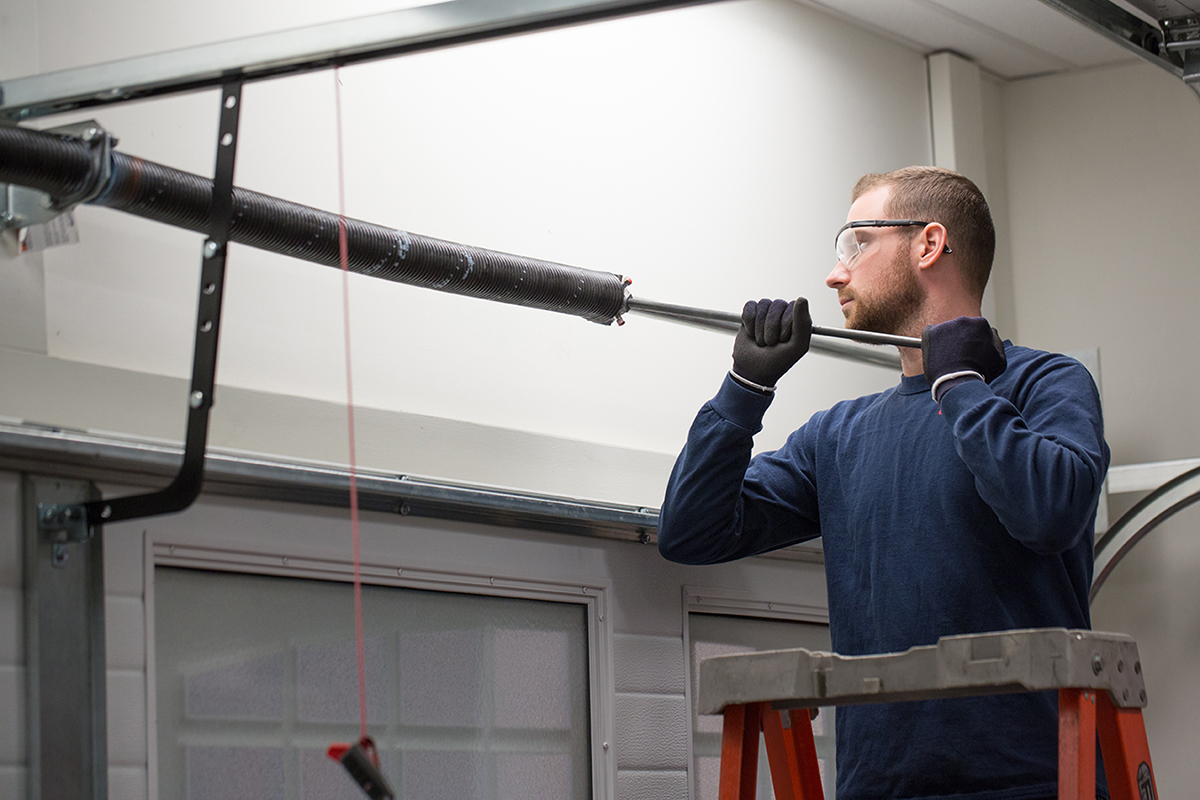
Inspect the Garage Door
Thoroughly inspect the garage door, springs, rollers, pulleys and all other hardware prior to installation to identify any worn or damaged components that require repair or replacement (page 3).
Gather all Necessary Tools and Materials
Gather the required tools and materials before starting to ensure efficient installation. This includes (page 4):
- Power drill with assorted drill bits and drivers
- Hammer
- Tape measure
- Socket wrench set
- Screwdrivers – Phillips and flathead
- Pliers
- Level
- Clamps
- Ladder
- Wire cutters and strippers
- C-clamps
- Opener hardware kit and components
- Warning labels
Check Critical Space Clearances
Verify that minimum space clearances exist for safe functionality (page 4):
- Side room – At least 18 inches from edge of door to walls
- Headroom – At least 2.5 inches from highest point of door travel to ceiling
- Top of door – At least 5 inches above the top of door
Step-by-Step Installation Instructions
Follow these step-by-step instructions to properly install the garage door opener:
1. Determine Rail Placement
- Position rail 6-12 inches from ceiling to provide adequate headroom clearance (page 5).
- Ensure rail spans width of door and centered.
2. Mount Header Bracket
- Center header bracket above garage door opening (page 5).
- Mark holes and drill pilot holes in header.
- Attach header bracket with lag screws.
3. Attach Rail to Header Bracket
- Align rail bracket against header bracket holes (page 5).
- Insert clevis pin through holes and secure with ring fastener.
4. Install Chain/Belt Pulley
- Slide pulley onto end of rail until it snaps fully into place (page 7).
5. Mount Motor Unit
- Slip belt over drive pulley and slide motor unit onto rail (page 7).
- Temporarily insert bolt to prevent sliding.
6. Determine Door Bracket Placement
- Mark vertical centerline of door (page 8).
- Center bracket at line with 2-4″ clearance from edges.
7. Install Door Bracket
- Align bracket at centerline mark and brace point (page 8).
- Mark holes and drill pilot holes in door.
- Attach with lag screws.
8. Connect Chain/Belt
- Run chain/belt between pulleys (page 9).
- Attach to door bracket using spring clip.
- Ensure spring clip faces inwards.
9. Mount Wall Control Panel
- Install within sight of door at minimum 5 feet from floor (page 10).
- Pre-drill pilot holes if needed. Use included screws.
10. Route Control Panel Wires
- Route wires from control panel to motor unit (page 11).
- Connect wires to proper terminals.
11. Install Safety Sensors
- Position sensors facing each other on door jambs (page 12).
- Sensors should be no higher than 6 inches from floor.
12. Connect Safety Sensor Wires
- Route wires from sensors to motor unit (page 12).
- Connect wires to proper terminals.
13. Attach Warning Labels
- Affix provided warning labels in visible areas (page 4).
14. Program Travel Limits
- Press and hold limit button, then press up/down arrow to set limits (page 13).
15. Test Auto-Reverse Function
- Ensure door reverses on contact with 1.5″ object (pages 13-14).
- Adjust limits if needed until auto-reverse works.
16. Test Accessories Function
- Ensure any wall consoles, wireless keypads, etc. function properly.
17. Lube and Grease Components
- Lubricate bearings, pulleys, springs per manufacturer specifications.
18. Seal Floor Crack
- Seal crack between floor and door with weather stripping.
19. Test Opener Operation
- Complete full cycle open and close tests to ensure proper functionality.
20. Educate Homeowner
- Demonstrate operation and safety mechanisms to homeowner.
- Provide instruction manual and warranty information.
Conclusion
Thoroughly following this 20-step installation guide ensures proper configuration and operation of the garage door opener for years of reliable, safe service. Contact manufacturer support with any issues.